Imagine; a hearty minestrone soup filled with broccoli and beans sourced solely from a backyard veggie garden! If this sounds like your flavour, our how-to guide on how to make a backyard vegetable garden has outlined every step with simplicity, broken down into 5 main stages:
- Location
- Type of garden beds
- Building your veggie garden’s garden bed
- Planning your garden
- Planting
Step 1: Selecting the right spot for your backyard veggie garden
Your veggie garden loves sunshine
A patch requires at least five hours of sunlight per day, so pick a spot for your backyard vegetable patch that receives ample amounts of natural light. Direct sunlight helps to create disease-resistant plants and sweeter flavoured carrots, tomatoes, chillies and onions. Some produce, such as strawberries or salad leaves require shade, but that’s easy to accommodate in a sunny spot – just create some shade with netting or a wattle fence.
The amount of sunlight your vegetables receive will also be determined by the direction of your patch. Your plants should ideally run along a North-South axis to maximise sunlight exposure and ensure good air circulation. In the Southern Hemisphere, the sun angles to the north, so try to put your taller plants on the south side of the garden so they don’t cast a shadow over the rest of your crops.
Your veggie garden should be flat
This ensures that plants receive equal water and sunlight distribution. However, having sloped land should not be a hindrance to growing a backyard vegetable patch – slopes can be levelled out by lining the bases of the beds with flat rocks, wood slabs or boards.
Pick an area that isn’t too windy
If that’s not possible, erect a fence as a wind barrier to protect your plants.
Isolate your veggie garden
It is best to keep your vegetable plot away from other plants. Ideally, patches should be planted around 3m from the drip line of trees. Otherwise, neighbouring bushes can absorb water and soil nutrients, depriving your vegetable patch of essential ingredients. There is also the risk of the roots of nearby trees growing into your patch and harming your vegetables.
If growing a patch away from trees is not possible, consider digging a trench around your plot. The trench should be deeper than existing roots, or be dug until you reach hard clay. Then place heavy material which roots cannot penetrate, on the edge of the trench, then fill the trench with the barrier material (a barrier helps to prevent roots from making their way into your patch).
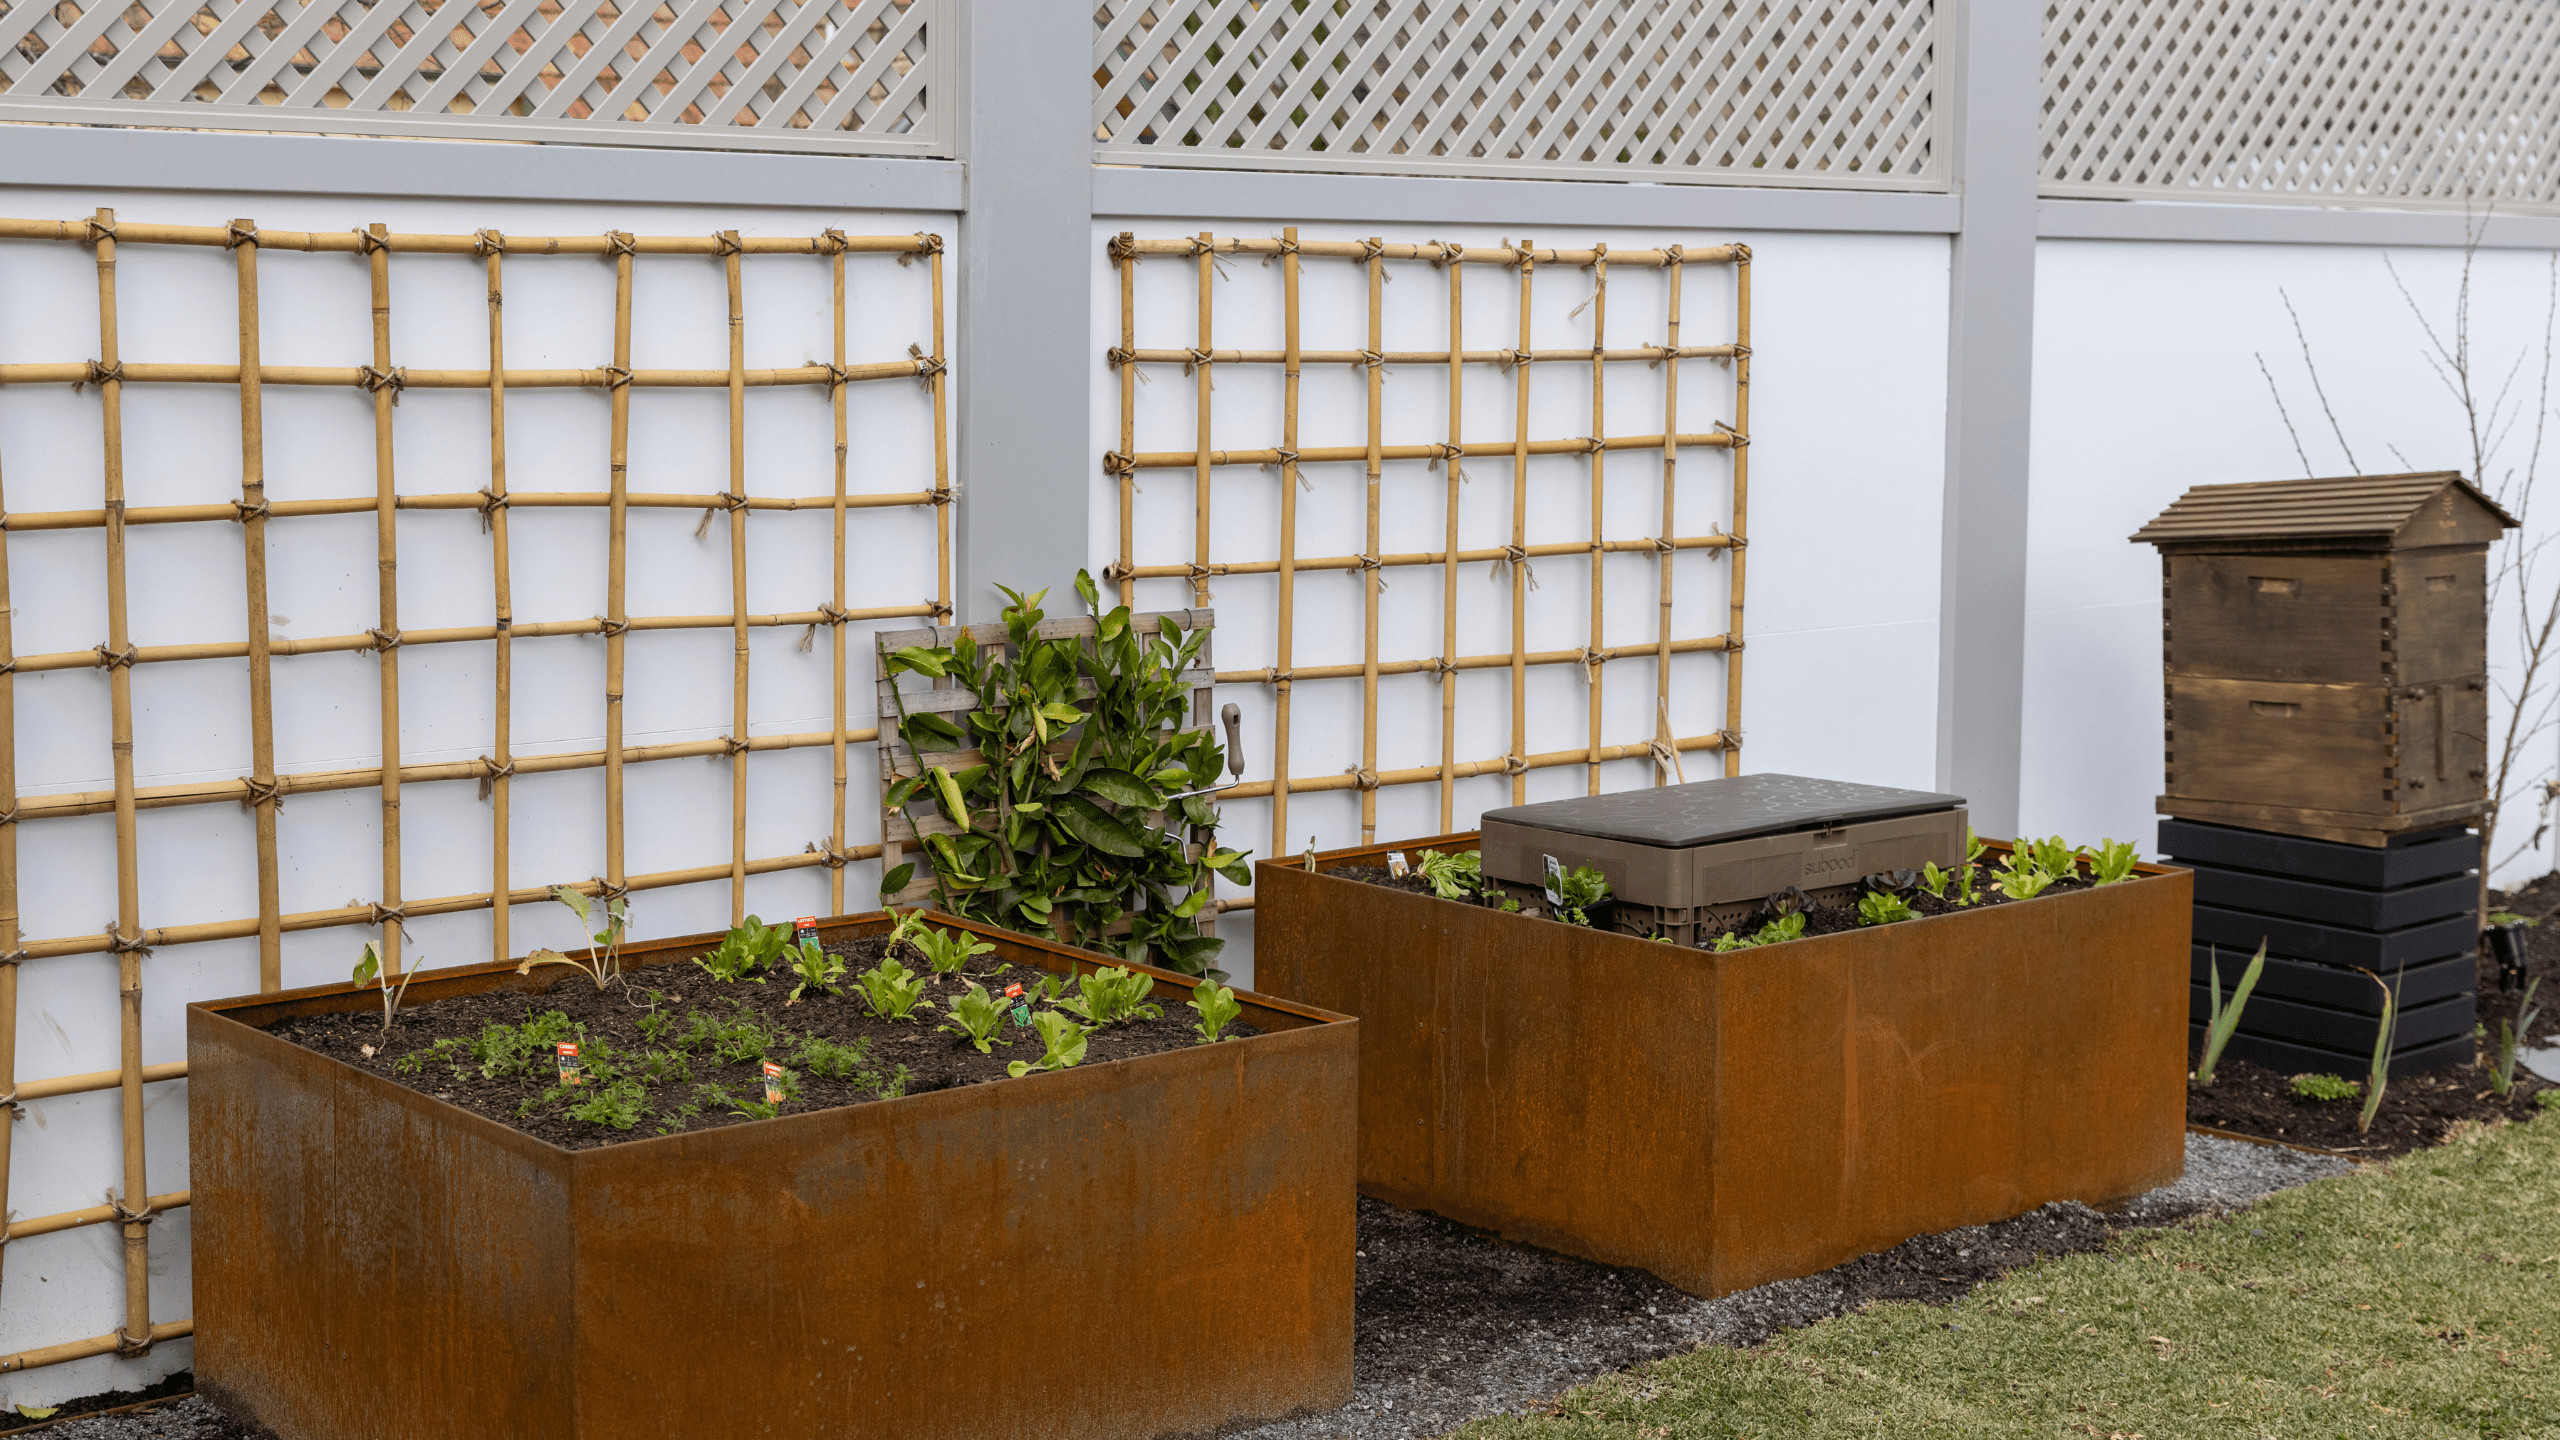
Step 2: Decide on the type of garden beds
You can either create one long garden bed, or plant several beds in your backyard. The latter is generally recommended if you have a bigger yard, so that plants with similar requirements can be grown together, and then rotated to different beds on an annual basis. Continually growing the same type of vegetable in the same spot of your patch can encourage a build up of soil diseases. This issue can normally be prevented from arising by employing the technique of crop rotation or permaculture techniques, such as companion planting.
If you have a spare garden bed designed to hold your plants in the next season, look after it in the preceding season. A ‘green manure’ cover crop helps to build soil tilth, adds nutrients to the soil and keeps it weed-free.
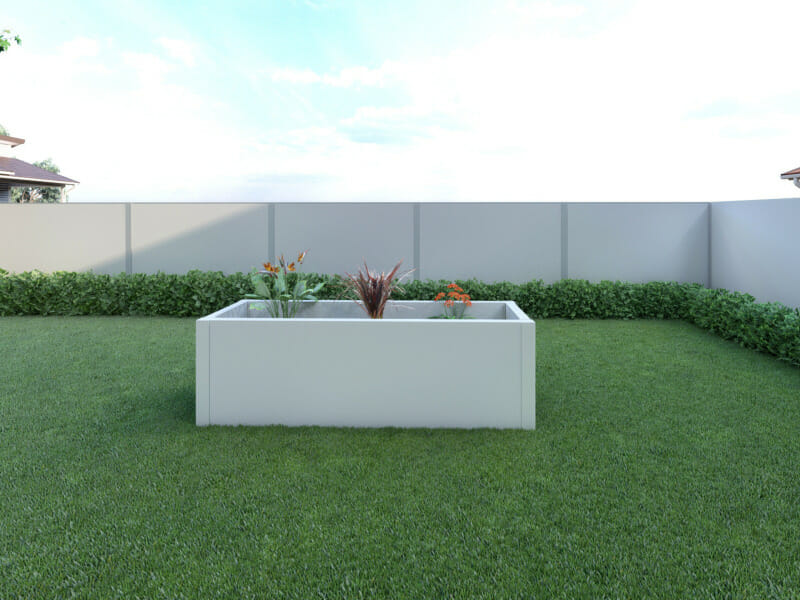
Then there is the question of whether to create an in-ground, raised or ‘sunken’ raised garden bed.
In-ground beds are preferable in warm climates, as they require less watering than raised beds. They are also easier to construct, as they don’t need wood slabs or lumber, unlike raised beds. However, a gardener will need to reach further down to reach the plants, and pets and children can easily walk over the garden beds.
Raised veggie garden are preferable in colder climates, since the soil warms faster in spring and drains more efficiently, enabling you to begin planting sooner. The retaining walls serve as a barrier to weeds and pests, such as slugs and snails, from entering your vegetable patch. They also provide the best drainage of the three beds.
‘Sunken’ raised garden beds carry the same benefits as raised garden beds, however they do not drain quite as well. This type of bed incorporates the soil, so there is no need to import soil.
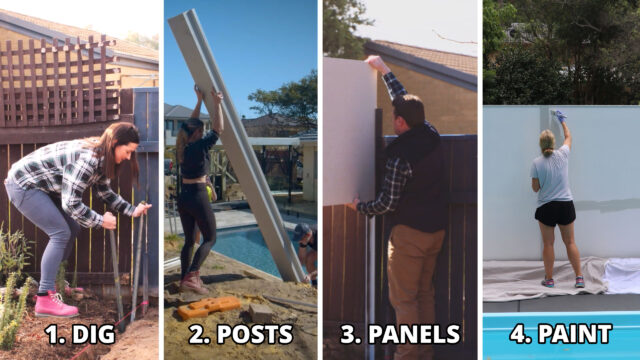
Step 3: Get to building!
It’s time to get our hands dirty! First, clear the area and rid your selected spot of turf and weeds.
If you’re building a raised garden bed, you will need additional tools and materials, depending on the design you choose. Choose a strong material for your garden bed. The structural integrity of this garden bed is imperative to how long it lasts (and how good it looks)!
A timber garden bed will be cost effective, but highly susceptible to rot and termites. Masonry is very strong and offers a premium look, but unless you are confident in you technical skill, this installation can present its own challenges. For a modern DIY garden bed, consider an easy modular retaining wall kit; simply dig post holes, slide in panels and follow the same backfilling process as any other garden bed.
Next, install a weed-suppressing fabric, ensure that it is pressed firmly on the ground and tightly against the corners. If you’re planting several beds, ensure that there is enough room between the beds for walking and rolling a wheelbarrow through.
Prepare your unsoiled soil
Untouched soil that hasn’t been gardened before is ideal for your vegetable patch during the first year. This type of soil contains untapped nutrients and minerals that your vegetables will thrive on.
Determine soil pH
This is the level of acidity or alkalinity in the soil; a pH level of 6.0 or 7.0 is ideal for most vegetables. You can check the pH level of the soil before planting by using a soil test kit. A low pH indicates acidic soil and can be sweetened by adding lime, whereas a high pH level in soil can be lowered with the addition of sulfur and rich organic matter.
Dry, not damp
Before planting, ensure your soil is relatively dry by breaking up any clumps with a tiller, then going over the soil patch with a rake. Soil should be crumbly, not clumpy. You can also dig a trench around your garden bed for better drainage, or construct a raised vegetable patch instead of an in-ground one.
Black gold
Gardeners refer to compost as ‘black gold’, because organic waste matter helps to create rich, nutrient-filled soil. Compost should be added once your soil is clump-free and crumbly after turning. The organic matter should be spread across the top 1-2m of the backyard vegetable patch; this ensures the roots of young plants reap the benefits of exposure to organic materials. You can also add bags of soil conditioner or rotted manure as alternatives.
Once you are satisfied with the quality of your soil, add it into your raised garden bed. Fill the garden bed with well-drained garden soil and compost, while leaving a 30mm gap at the top.
Step 4: Plan your planting
You might have carved out enough space for a small vegetable plot to begin with, but it’s also worth considering any long-term ideas for your backyard space. Plans to plant trees, or additional plants, may interfere with your patch. For example, if you plan on branching out into fruit trees down the track, set aside a 6 metre root spread.
Allow plants to breathe
Plants need space to grow and flourish into fully-grown healthy vegetables. A well-tended 3m x 3m vegetable patch will be enough space for most garden beds. It is recommended to leave about:
- 20cm around a row of salad leaves
- 35cm around a row of carrots
- 45cm around a row of beans
- 75cm–1m per plant for eggplants
Pick the right produce for your backyard veggie garden
It’s important to consider climate when creating a veggie garden. Certain vegetables will thrive in warmer weather, but may be disease-prone and difficult to cultivate in colder climates. Cauliflower, onions and peas do best in temperatures between 10-20 degrees Celsius or lower, whereas capsicum, potato, tomato and eggplant need temperatures about 20 degrees Celsius for optimum growth.
You can also decide when to plant crops based on their climate requirements. The vegetables that require high temperatures will need to be planted and given time to grow in the warmer months of the year. Picking the right produce also involves consideration of pest control. You can ward off pests naturally by employing the technique of companion planting; this type of planting involves growing complementary plants close together.
For example, onions and carrots should be grown close to one another, as the pungent smell of onions is supposed to confuse pests drawn to carrots. The strong scent of basil also repels aphids that are often drawn to tomatoes and other produce.
Step 5: The plot thickens
Now that you have created your vegetable patch, filled it with rich soil and selected suitable produce for your patch, it’s time to begin planting! The overall layout and configuration of plants in your vegetable plot needs some consideration.
There are two primary approaches to planting vegetables – row cropping and intensive cropping. The latter is generally recommended for smaller patches, as it enables you to compact more vegetables into a smaller space.
The closer spacing of plants means you usually have to weed by hand, a more time-intensive process than using a tiller between plants with the row cropping approach. Intensive cropping tends to be more visually interesting, as you can create your own pattern and display of crops. Incorporating decorations, such as garden gnomes is another way to create a unique and interesting visual effect.
Caring for your crops
Once you have set up your backyard veggie garden and planted the seeds, you’ll need to continually tend to your crops. These are the tools you might need to maintain your vegetable patch:
- Tiller: To break up and loosen soil, give plants more room to grow and gather organic waste matter (to be worked into your vegetable patch)
- Spade: Turning soil, digging up weeds, and transferring soil and compost to the garden.
- Wheelbarrow: For transporting soil, compost and waste from or to your vegetable patch.
- Rake: After tilling the patch, a rake helps to break up chunks of soil and creates an even plain for planting your crops.
- Composters: A recycled plastic bin holds organic waste matter and prevents odour normally found in wheelie bins.
- Hoe: Used to chop weeds, shuffle soil over to create a hill needed by some plants, and dig trenches for planting.
- Trellis: Beans, peas and some other vegetables need something to climb as they grow. A trellis helps them grow upward rather than outward.
- Irrigation System: A watering can is fine for small plots, but a hose with a sprinkler or nozzle will be more efficient and effective for larger vegetable patches.
- Pruners: To harvest herbs and vegetables, deadhead plants, and cut back growth.
- Basket: To carry fresh produce from your backyard into your home.
Mulching
Adding mulch to your patch will help your garden to retain moisture, suppress weeds, and prevent soil crusting. Mulch should be placed on the ground surrounding each plant. Most patches will need mulching on a yearly basis (if you’re using finer mulch you may need to top up more frequently).
Mulch reduces the need for weeding and helps to conserve water by reducing evaporation through the surface of the patch. Examples of mulch include barley or pea straw (easily incorporated into the soil by worms), alfalfa hay, fresh seaweed that brings minerals to the soil and deters slugs. If you use seaweed as mulch, place a generous amount on the soil as it dries and shrinks easily.
Watering
Water the plants at least every day, for the first few days. After that, slightly reduce the amount and frequency with which you water your plants. This reduction will encourage the roots of plants to grow deeper in search of water. Ultimately, your crops will grow into stronger, healthier plants.
Pest Control
To discourage pests, you can rotate your crops annually, mulch fairly regularly and maintain rich, organic soil. However, sometimes pests will persist. You can use homemade natural pesticides like garlic, chilli or coffee mixed with soapy water in these situations. Using seaweed fertiliser in mulch or spray form also helps to prevent disease in plants.
A sustainable and thriving backyard veggie garden requires consideration of a variety of elements. Creating rich soil is perhaps the most important element to bear in mind. Rich matter helps to establish a fertile environment in which vegetables can flourish, so cultivating quality soil is well worth your toil.