Thinking of hiring someone to complete a wall or fencing project for you? Before you jump right in and contact a landscaper, there’s some handy planning you need to do, and a few key decisions you need to make. We’ve got all the details about how to plan your project, broken down into five simple steps.
Step 1: What exactly do you need and what do you need it for?
The first thing to consider is why you’ve decided to begin this project in the first place. Your primary reason for building the wall or fence will determine many aspects of the planning process to follow, so it’s important to narrow down your focus here. Some of the most common reasons for a fence or wall include:
- Increasing safety/security and preventing trespassing
- Offering a measure of privacy
- Boundary demarcation
- Decoration
- Keeping pets inside
- Creating a safe play area for children
- Enclosing a pool
Whichever of these reasons apply to your project, be sure you’re clear about the purpose of the new structure.
Step 2: Think about size, style and materials, and set yourself a budget
Once you’ve clarified why you want to build it, it’s time to decide on a few other factors:
- Its size
- The material it will be made from
- How you want it to look
- What you want it to say about you
- Your budget
Initial ideas about the size and style of your wall or fence, as well as the materials it will be constructed from, will usually be determined by its purpose. We’ll look more closely at how to draw up exact measurements below, but for now, here’s a basic overview of the sizes, styles and materials you may want to consider.
Safety and privacy
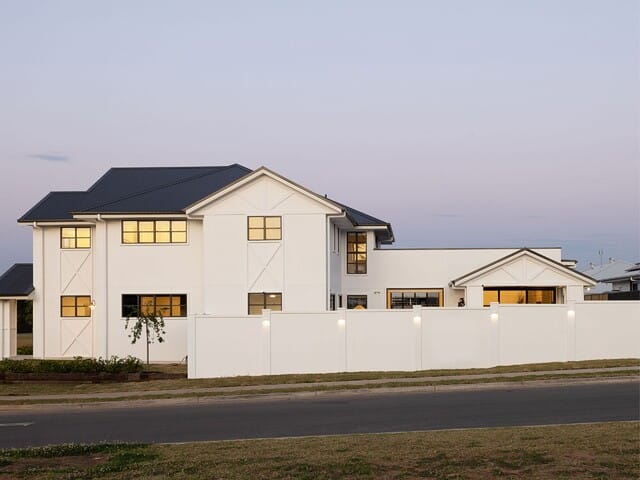
Safety and privacy walls are the tallest and sturdiest types. They’re tall and solid enough to screen your home and provide privacy, and/or to deter trespassing. It’s usually best to stick to sturdy materials such as brick or modular walls for this type of structure.
Boundary
Boundary walls and fences between properties are also usually quite tall, but not so tall as to completely block views on either side. Usually, you’ll have to negotiate with your neighbours about this type of solution. These materials can include steel, vinyl and timber, as well as the brick and modular walls mentioned above, and will usually depend on how much each party can spend and what matches the architectural aesthetic of both homes.

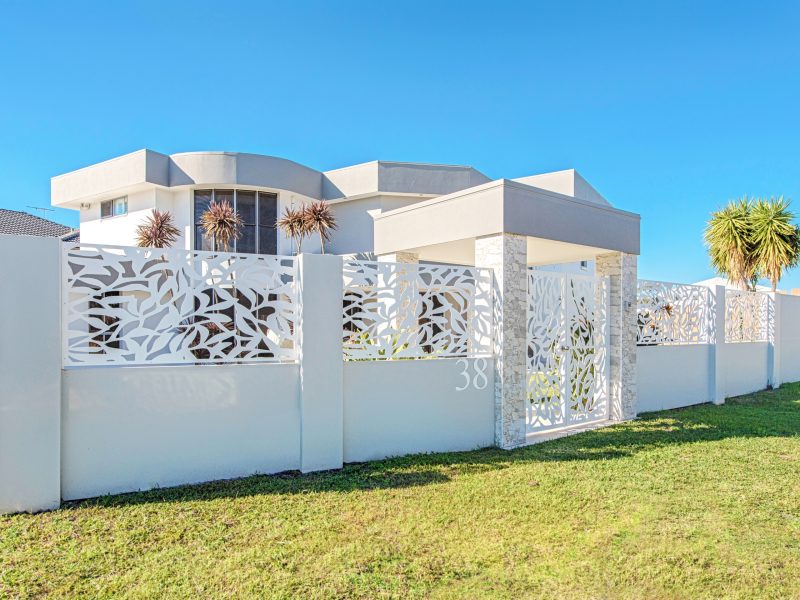
Decorative
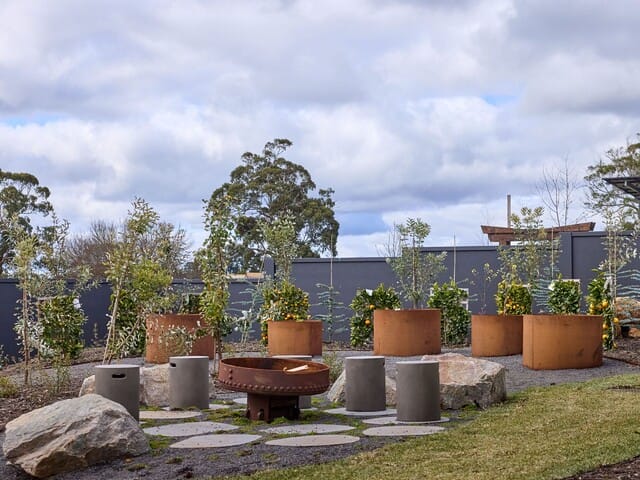
Decorative walls are usually not as tall as privacy or boundary structures – some may even be as low as knee-height. They are often ornamental in style and can really be made of any material you choose – common options include decorative wrought iron and picket fencing. There’s room to get creative when the purpose of the wall or fence is strictly aesthetic – consider solutions that are innovative and reflect your personal style. For more inspiring ideas, click through to our previous blog post on innovative front walls.
Enclosures
Enclosure fences, such as those surrounding pools, must usually meet minimum height regulations as stated by your local council (more on council regulations below). They can be made of materials such as aluminium or even chain-link metal, but as long as your preferred materials are council approved, they can be matched to your desired design if you prefer more premium solutions such as glass, iron or block.
To pick the most suitable option for your property, list any specifying factors in your research, such as:
- Do you need retaining capabilities for garden beds or stepped blocks?
- Is site access an issue with your property – perhaps a narrow/steep driveway or close proximity to a pool/steep drop?
- Are you positioned by a busy highway or noisy playground and looking for sound reduction qualities?
- Are you exposed to harsh climates, such as high wind regions or areas prone to bush fires?
These requirements will guide you toward or away from certain materials and enable you to focus your research.
All of the above factors will have an impact on your budget considerations. Obviously, the bigger the structure and the more expensive the materials used, the higher your budget will need to be. Check out a few different suppliers to get an idea of how much the materials for your fence will cost. Keep in mind that these costs will also need to be added on top of the labour costs charged by the contractors you employ.
Step 3: Check local council regulations and notify your neighbours
When you’ve made decisions about all the different factors regarding your wall or fence, you need to make sure everything is OK with both your neighbours and your local council.
Most councils impose restrictions on construction in homes and backyards – particularly wall and fencing structures. Your local council will have its own set of rules and regulations regarding height, style, positioning, and whether or not you need to give notification that you are building a new structure.
You will also need to talk to your neighbours about what you’re planning to build. Even if you think it won’t impact your neighbours or their property, it’s common courtesy to let them know if you’re planning to construct a new wall or fence.
If you have any difficulties with your neighbours when you notify them of your project, check out our comprehensive guide to fencing disputes, which might help you resolve the issue.
Step 4: Draw up a plan for your fencing project
Once you’ve done all this, you’re ready to get plans down on paper! To help your contractor provide an accurate quote for your fencing project, we recommend drawing up some basic plans.
Don’t worry – you don’t have to be an expert in architecture or construction to do this! Your plan doesn’t have to be 100% accurate; you just want to get the basic elements down on paper. Here’s a breakdown of what to do.
Create an overhead view plan
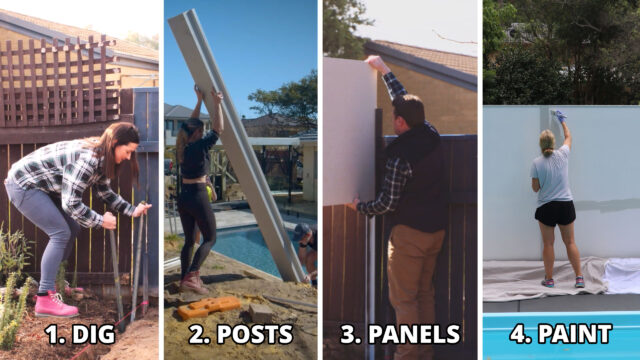
- Take a large piece of grid paper and create a simple overhead view of the perimeter you want your fence to cover – see the images above as examples.
- Leave openings where gates may be required and highlight things that may get in the way or pose a hazard, such as trees, concrete slabs, loose soil and uneven or sloping ground (see below).
- Mark dimensions in millimetres, and if there will be a change in height in any area of the fence, start a new measurement.
Work out your elevations and ground slope
This is an optional step, as it isn’t required for an initial quotation. However, you may wish to include it anyway. Usually, the more detail you provide, the better. Before you begin, check if the installer would prefer to measure during the initial meeting.
If you’d like to include these measurements:
- Using more grid paper, show the individual detail of each part of your fence (style, height and slope of ground). See the images above for examples.
- In order to determine the slope of the ground, place a spirit level on the slope and take a measurement back to the ground level. A standard level is normally 1200mm long, so you’ll need to indicate if your level differs – knowing the length of the level is critical to working out the slope.
- When describing the slope, use the following indications – ‘mild’ if you were to place a soccer ball on the ground and it would roll away, ‘medium’ if the soccer ball would roll quite fast, or ‘steep’ — a mountain goat may have trouble getting up here!
- If there are multiple slopes on your site, use your level to measure each of the slopes individually and mark them on your elevation.
Step 5: Get in touch with a contractor for a quote
Once you have your plans in place, it’s time to get in touch with an expert who can provide a quote for the work that needs to be done. It may be tempting to try to carry out the project yourself, but if you’re not sure of your experience, skills or time, trust us – in the end, you’ll be glad you hired someone to do the job.
Remember to ‘shop around’ and compare quotes from different installers and companies. Have a look into the kind of work they do and familiarise yourself with their style, reputation and budget bracket. Ask if they provide a free, no obligation quote – if they do, have them come and measure and share with you their suggestions. By comparing quotes, you can be sure you’re getting a fair deal and feel more confident about the options available to you.
Once you’ve gotten a few quotes and you are deciding on which installer to use, review all factors. The cheapest quote may not be the best quality, and the most expensive may not be the best value. Review the quality and durability of the materials and the reputation of the installer. Then, compare these factors to make a balanced and informed decision.
Have an open mind for your fencing project
Be prepared to modify or update your fencing project plans. Your initial thoughts of what’s possible or impossible may change after a conversation with a trade expert – limitations or possibilities that may not be apparent to you may become clear after speaking with a few different installers. If you’re interested in ModularWalls as an option, get in touch with us by calling 1300 556 957 or filling out a contact form with details of what you’re after.